 I’ve loved the moon ever since I was a little kid.
I love it even more now that I can fully appreciate its energy and power.
I look forward to the full moon each month because it’s a great time to take stock of what’s working in my life, what isn’t, and release what is no longer serving me.
It’s also the perfect time for cleansing crystals in the moonlight.
Usually, I only cleanse and re-charge the crystals I’ve been using frequently since the last full moon.
This includes any crystals I may wear as jewelry. So my gemstone bracelets and pendants all get cleansed and re-charged, too.
Everyone has his or her own ritual for cleansing crystals under the full moon. Below I’ll share the process I go through each month, but I also encourage you to follow your intuition and do what feels right for YOU! :)
Cleansing crystals in the moonlight
This post contains affiliate links that support the work of Finding Magick at no extra cost to you. Read my disclosure policy for more information.
Step 1 – Gather your supplies
Before beginning, gather everything you’ll need for cleansing crystals in the moonlight. The supplies I use include:
- My crystals
- A smudge stick
- A candle lighter
or matches
- An abalone shell
or other fireproof receptacle
- A tray or flat surface to lay your crystals on
Step 2 – Cleanse your crystals (optional)
Even though the moonlight itself can cleanse crystals, I like to release any negative or stagnant energy from my crystals prior to setting them out to bathe under the full moon. I do this using a white sage smudge stick and an abalone shell
to catch any ash.
Light the end of the smudge stick with a candle lighter, allow the flame to extinguish and then use the smoke to cleanse and clear your crystals. I usually pass each crystal through the smoke twice… once on one side, then flip it over and pass it through the smoke again on the other side.
Most often, I’ll hold the smudge stick in one hand over the shell and use the other hand to hold and pass the crystal through the smoke. However, you may also lay the smudge stick inside the shell while you pass the crystals through the smoke. Here’s a short video demonstrating the latter:
Be sure to place the shell on a fireproof surface away from anything that could burn. And it should go without saying, but never leave a smoldering smudge stick unattended!
If you don’t have an abalone shell, you could use any receptacle made from a fireproof material such as glass, pottery, metal or rock. For instance, an empty tuna can could work!
If you don’t like the smell of white sage, there are other types of smudge sticks available such as palo santo, cedar or try a blend like sage and lavender. Mini smudge bundles are a great way to try different smudging herbs before committing to a specific scent.
Once you are finished smudging your crystals, ensure the smoldering stick is completely out by dousing in water. I usually run the smoldering end of my stick under the kitchen faucet and then place it in the shell to air dry. You may return back to the earth any ash that collected in the shell. (Make sure the ash, too, is out and won’t start a fire before returning it to the earth.)
Step 3 – Arrange your crystals in the moonlight
 Find the best place inside or outside of your home for your crystals to bathe in the full moonlight. This might be on an interior window ledge, or outside on a tray if the weather is nice enough. I often set my preschooler’s picnic table on our driveway and put my crystals on that.
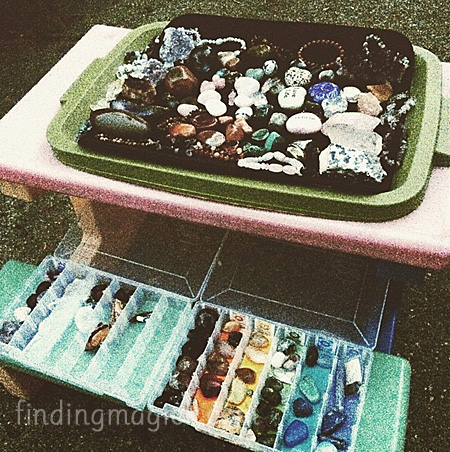
I’ve been using the lid of a Rubbermaid tote because it’s all I’ve had on hand. Whatever will keep your crystals safe while allowing them to bathe in the moonlight will work. I’ve heard that some people set out crystals on the dashboard of their car!
I have some of my crystals sorted according to chakras in plastic cases, so for those I keep them in the case and just open the lid. I keep my smallest crystals inside the house and set them out on a window ledge that faces the full moon.
There is no right or wrong way to do this step as long as the moonlight reaches your crystals!
Step 4 – Release what no longer serves YOU (optional)
I’d like to mention the full moon is a wonderful time to rid yourself of things that no longer serve you. Maybe it’s a toxic relationship? Excess weight (literal or figurative) you’ve been carrying around? A bad habit? Toxic thoughts or feelings? Take a moment to think about what no longer serves you then release it under the full moon. Personally, I’ve performed five different full moon rituals, depending on my mood.
Most often, I just step outside into the moonlight, ground myself and then talk to the moon. I thank the moon goddess for everything the universe has given to me, tell her about everything I wish to release and allow her to take it from me. I close my eyes and visualize it leaving me as I let it go.
Step 5 – Bring in your freshly cleansed and charged crystals in the morning
In the morning, don’t forget to go back outside and gather your moon-charged crystals! Often, my crystals are covered in morning dew so you may wish to allow some time to lovingly wipe them dry or let them air dry, whichever you prefer.
Leave a Reply